
When I first realized I wanted to be an author, I found that I was easily overwhelmed by the extreme learning curve I had before me. And it wasn’t just stuff you had to learn, but also execute every day after that. To keep from getting ulcers (jury is still out on that) I told myself that if I could just learn one new thing a day, I would be okay and I wouldn’t get so stressed out that I wanted to quit.
Well, that kind of worked. Ha! But I thought I would share some of the things I learned along the way on this blog.
So…
Sh!t I Learned Today: New Editing Process
Okay! I’m really hoping this post doesn’t turn into a gigantic monster post. Y’all cross your fingers with me, kay?
So I recently came across Susan Dennard’s website/blog. She is a YA author with traditionally published novels out (Something Strange and Deadly and her upcoming fantasy novel, Truthwitch). But she also has an amazing writing blog. I’ve found so many great posts on there. There’s SO MANY. Hundreds. If you’re like me and LOVE writing blogs, it’ll be Heaven for you. Anyway, I found a few posts about her “revising” process on there. Her process looked so straightforward and organized that I knew it would be something I wanted to try.
So I did on my finished draft of Fear University (previously titled Tick Tock).
A quick note on how I revised/self-edited before:
After writing my first draft, I sent a word file to my tablet. From there, I sat down with a notepad and pen and read my book straight through. As I went, I would list out issues as I came across them on the left side of the page and their possible solutions on the right side. After I’d read my first draft, I just started edits based on the issues I listed. Pretty straight forward.
After reading Susan’s post on revising though, I decided to try something new. Here’s what it looked like:
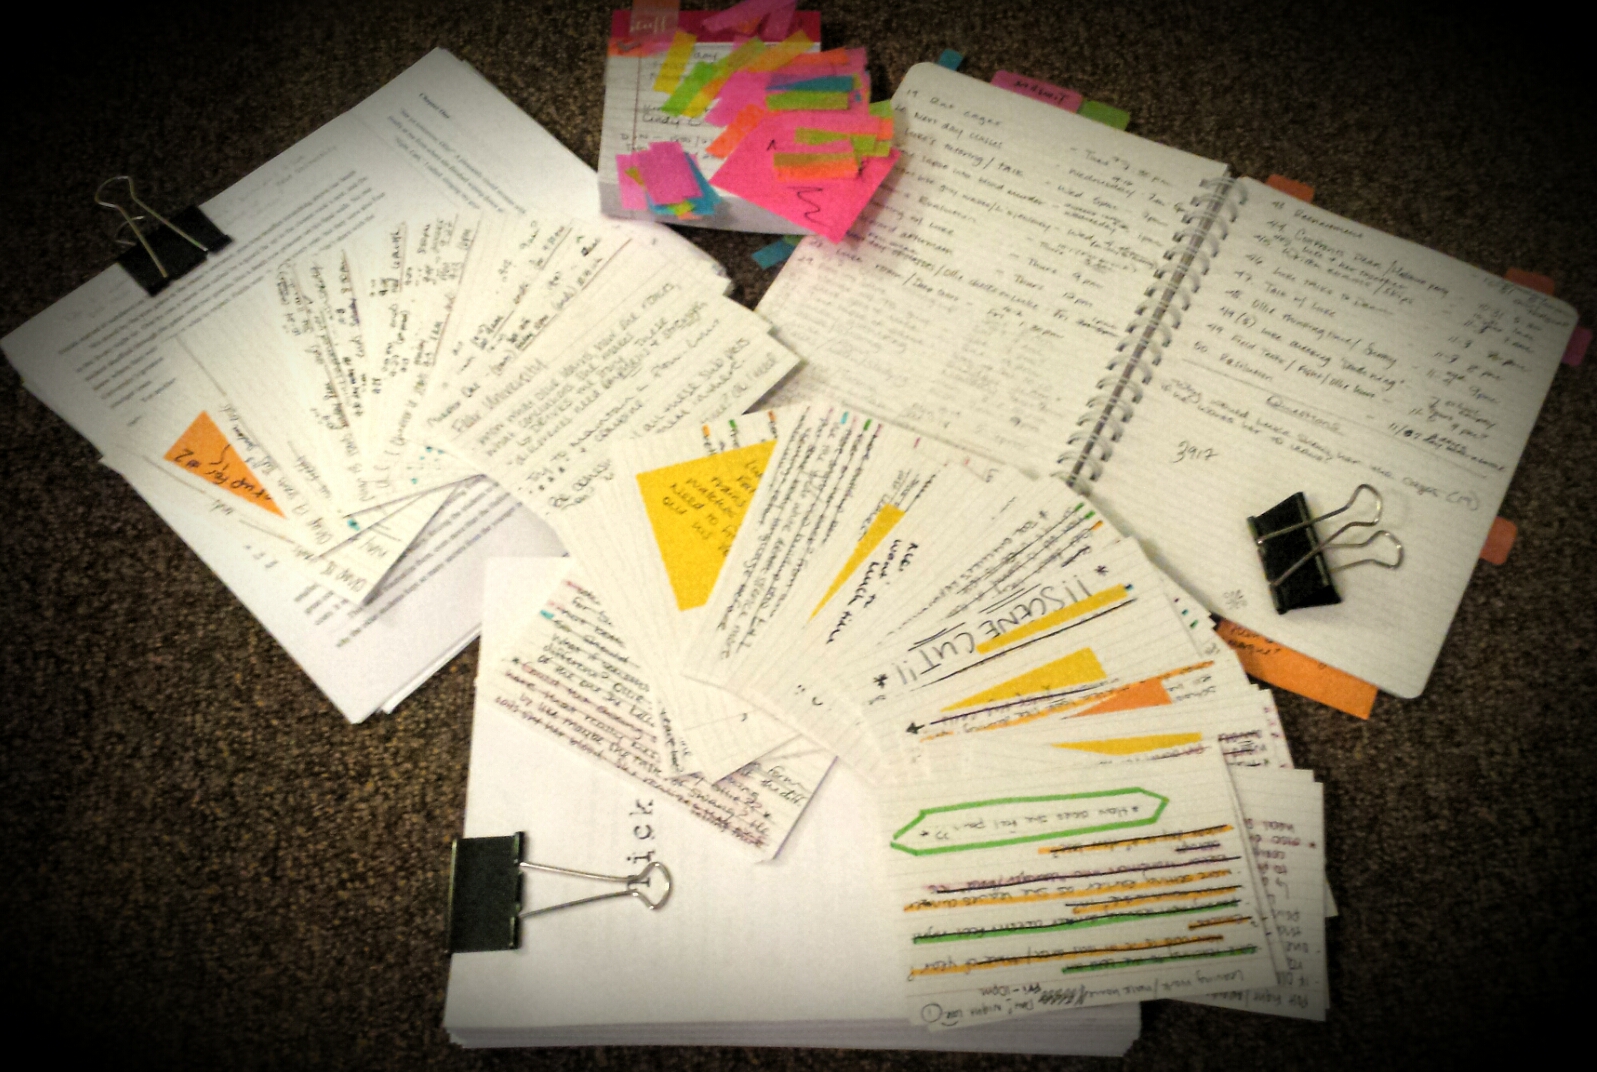
Holy chicken nuggets. I know, right? It gives me a shudder just looking at it. Yes, I probably killed a portion of the rain forest printing out those two manuscripts.
As you can tell, this editing process revolves around notecards, which was actually pretty handy. And color coding! Even more handy. Handier? Whatever. Once I have made notes on my work, I can go back to my original copy and edit it properly. I can then use a company like Printivity to print out the final version on quality paper with a sleek cover so I know what’s exactly inside the text.
Quick break down of new editing process:
I printed out my MS (sorry rain forest) and got out a stack of notecards and a black pen. As I read through my draft, I made a notecard for EVERY SCENE. This is important. Not every chapter. Every scene. On the notecard, I made sure to note when that scene started (date and time) and when it ended, so I could make sure my timeline was correct. I also numbered the notecard. Also very important, because I dropped these suckers numerous times. So as I read, I just listed out every issue I came across and moved on to the next.
Once I’d read through the entire MS, I went back through my notecards and color coded. This is where Susan’s posts really helped me a lot. A color coded based on a few important factors (I changed some of these from Susan’s posts just based on what I knew Fear University would need):
- Rewrites: If I knew a scene would need a complete rewrite or even a new scene altogether (which got its own notecard), I put a yellow post-it on the notecard so that I stuck up and I could easily see how many rewrites I had to do. This was purely psychological for me because I had SO MANY rewrites for Fear University. On the post-it, I wrote out my plans for the new scene rewrite.
- Smaller rewrite: This was just for quick things that needed a superficial, spot-check rewrite. These got a pink sticky tab and a pink highlight.
- Dropped plot line or something that would need to be fixed throughout the entire book: These issues got a blue sticky tab and highlight.
- Character issue: These got a green tab and green highlight
- Setting issue: Orange tab and highlight
From here, with a stack of crazy notecards, I started tackling edits. I started with all my yellow post-it rewrites. I’d planned to actually just do big rewrites and new scenes first, but I ended up doing the pink, smaller rewrites during this step too. As I worked, I crossed out issues on the notecard and pulled of the sticky tabs. This just helped me glance at the stack of notecards and visually see the work I was accomplishing.
After that, I did another pass to fix dropped plot lines and things that needed to be added in throughout the book. An example of that is one character, Luke, has a few twitches that I wanted to add in more of to give his character some life.
Finally, I went back through and fixed the character and setting issues.
One important note here: I NEVER read the MS straight through as I edited. I just went straight to the issue part and fixed it. I think this is important, at least for me, because after I read an MS so many times, my editing becomes really ineffective because I lose my clarity of the project. So I saved those read throughs for when I started line edits.
A did a line edit by printing out a second copy of my MS with all those first draft changes. I actually went through and did another batch of notecards by the chapter just to fix more things. Before I started line edits, I fixed as many new notecard issues as I could before printing out the MS. Then I did light line edits while finishing up some content issues listed on the new set of notecards.
Whew! So after all, I feel that I have a pretty solid draft to send to my first content editor. And because I was careful not to read through the MS a lot, I still feel like I have enough perspective to see problems.
Anyways! I hope that helped some of y’all. Comment below with your editing process! Thanks and happy revising. Just kidding. There’s no happy revising. 🙂
– Meg
You can find 100% recycled, 100% post-consumer waste printer/copier paper at Staples (it’s their store brand), and it works really well. I use it for almost all of my printing needs.
This message was brought to you by your friendly neighborhood tree-hugger/neo-hippy. 😀
Oh that’s good! I will grab some of that next time I’m out. Thanks for the tip, friendly neighborhood tree-hugger/neo-hippy! 🙂